Transform Your Old PC into a PXE Server with iVentoy: Say Goodbye to USB Drives!
2024-12-29
Author: Li
Setting up a new operating system can often be an exciting yet tedious task, especially for those of you who frequently experiment with various Linux distributions. One common hurdle is the creation of a bootable USB drive, which can be cumbersome. Enter the Preboot Execution Environment (PXE) server—a smarter way to boot operating systems from a central ISO repository through your local network. If you have an old PC with an Ethernet port lying around, you can easily convert it into a PXE server using the versatile tool called iVentoy.
Getting Started with Your PXE Server
iVentoy is compatible with both Windows 11 and Linux, giving you the flexibility to choose your operating system for the PXE server setup. Just follow these straightforward steps to set up iVentoy:
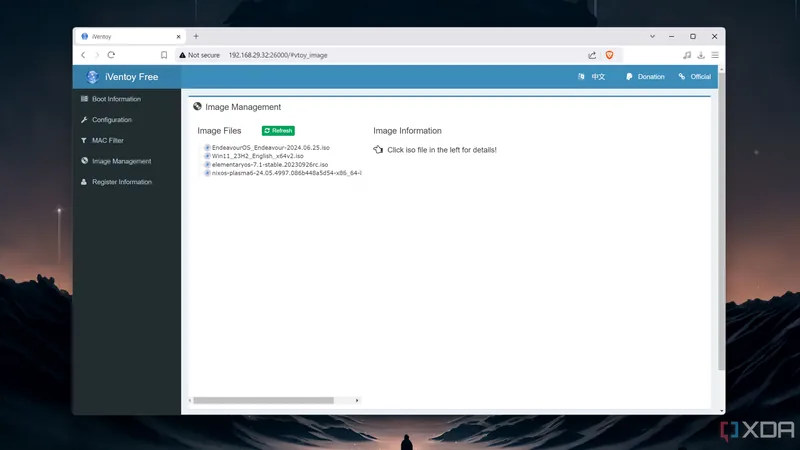
1. Download iVentoy: Head over to the official iVentoy GitHub repository and download the archive that suits your OS. 2. Extract the Files: Unzip the iventoy.zip folder. For Linux users, navigate to the terminal within the directory where the iventoy.tar.gz file is located and use the command: ```bash tar -xvzf iventoy-version-linux-free.tar.gz ``` (Make sure to replace the version string with the actual version number.) 3. Add ISO Files: Copy the ISO files you want to make accessible via the PXE server into the iso folder. 4. Run iVentoy: Launch iventoy.exe with administrative permissions on Windows. If you’re using Linux, execute the script with: ```bash sudo ./iventoy.sh start ``` 5. Firewall Settings: When prompted, allow iVentoy to connect through your firewall to enable network access. 6. Access the Web Interface: Open your web browser and enter the PC's IP address followed by :26000 to access the admin interface.
Configuring Your PXE Server
Before you start adding images to your PXE server, ensure your network settings (IP address, NIC name, Subnet Mask, and Gateway) are configured correctly and hit the Start button. You can also add more images later by copying them to the iso folder and refreshing the Image Management tab.
Connecting to Your PXE Server
To boot from your newly established PXE server, you’ll need to adjust the BIOS settings on the target PC you wish to test: 1. Connect the test PC to the same network as the PXE server using an Ethernet cable. 2. Power on the test machine and repeatedly hit the Del key to enter BIOS setup. 3. Navigate to Boot settings and set UEFI Network as Boot Option #1. 4. Enable both LAN Option ROM and Network Stack found under the Integrated Peripherals tab to enable PXE support. 5. Save these settings and exit BIOS. Once done, your PC should boot into the iVentoy Boot Environment, allowing you to select from your available OS images.
Why Choose a PXE Server?
No more fumbling with bootable USB drives! Using a PXE server like iVentoy not only streamlines your installation process but also enhances flexibility. While you can configure iVentoy on a physical PC, consider leveraging a virtual machine in your home lab to expand your capabilities further. The free version of iVentoy supports up to twenty clients, but if you’re looking to upgrade the features (like support for ARM64 systems), the Pro edition is available for purchase. Ready to revolutionize your OS installation experience? Transform that old computer into a powerful PXE server today!

 Brasil (PT)
 Canada (EN)
 Chile (ES)
 Česko (CS)
 대한민국 (KO)
 España (ES)
 France (FR)
 Hong Kong (EN)
 Italia (IT)
 日本 (JA)
 Magyarország (HU)
 Norge (NO)
 Polska (PL)
 Schweiz (DE)
 Singapore (EN)
 Sverige (SV)
 Suomi (FI)
 Türkiye (TR)
 الإمارات العربية المتحدة (AR)