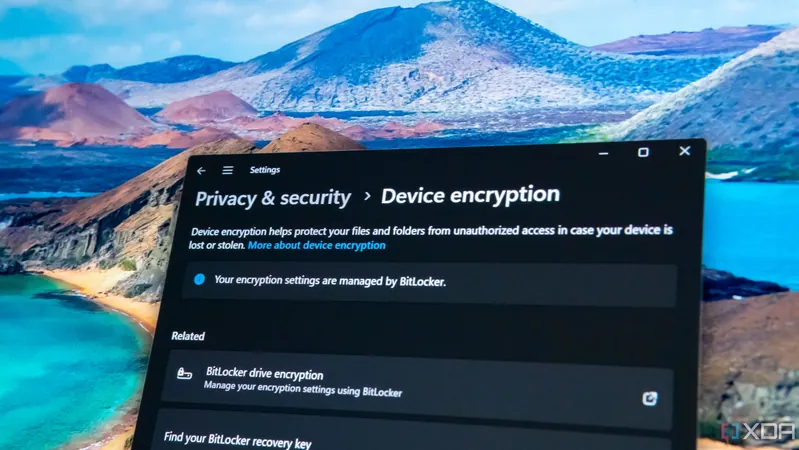
Unlock Your Data: A Complete Guide to Using BitLocker for External Drive Encryption on Windows
2025-01-04
Author: Noah
Unlock Your Data: A Complete Guide to Using BitLocker for External Drive Encryption on Windows
In a digital age where data privacy is paramount, ensuring the security of your files is more critical than ever. Windows offers a powerful tool known as BitLocker, available on Windows 11, Windows 10, and select older versions, that can encrypt your entire drive. This safeguarding feature is vital for users who want to protect sensitive information from theft or unauthorized access. However, not every Windows version includes this feature; it's specifically available for the Pro, Enterprise, and Education editions.
What is BitLocker?
BitLocker isn’t just confined to encrypting the main drive where Windows is installed; it can also encrypt external drives like USB sticks, SD cards, and external hard drives. The process of encrypting a removable drive is straightforward and completed in a matter of minutes, making it an efficient option for securing sensitive files on the go.
Before You Begin: Important Considerations
To use BitLocker, ensure you're operating on the compatible versions of Windows. Note that the encryption can only be performed on Windows devices, meaning that accessing the protected data on non-Windows systems isn't possible.
When encrypting an external drive, it must meet the following requirements: - The drive must have a minimum capacity of 250MB. - It should be formatted using NTFS, FAT16, FAT32, or exFAT file systems. - It cannot be already encrypted with another program, and it must be the active partition if partitioned.
Step-by-Step Guide to Encrypting Your External Drive
1. **Connect Your Device**: Insert the USB or external hard drive that you wish to encrypt into your Windows computer.
2. **Open BitLocker**: Search for "BitLocker" in the Windows search bar, click on "Manage BitLocker," and open it.
3. **Locate Your Drive**: Under the "Removable data drives – BitLocker To Go" section, find your connected drive and select it.
4. **Start Encryption**: Click on the "Turn on BitLocker" button to initiate the encryption process. This may take a few moments.
5. **Set Your Password**: Choose to use a password for unlocking the drive, enter your desired password, confirm it, and click "Next."
6. **Backup Your Recovery Key**: This is a crucial step! Back up your recovery key to ensure you can regain access if you forget your password. You can save it on your computer, a USB drive, in your Microsoft account, or print it out for safekeeping.
7. **Choose Encryption Option**: If the drive is new and has no files, opt for "Encrypt used disk space only." However, if it contains files, select "Encrypt entire drive" to ensure all data is secure.
How to Access Your Encrypted Drive
To access your encrypted drive, simply connect it to your computer. If you encounter a message such as "Location is not available" or "Access is denied," don't worry; this indicates BitLocker is functioning correctly. Follow these steps to unlock it: - Open File Explorer. - Click on "This PC" to view your devices. - Double-click the encrypted drive to access the unlock prompt. - Enter your password and click "Unlock."
Turning Off BitLocker Protection
If you decide that you no longer need the encryption, you can easily disable it. Insert the drive into your computer, unlock it with your BitLocker password, then open the BitLocker manager, find your drive in the list, and select "Turn BitLocker off." Confirm your choice when prompted to remove the encryption.
Stay Secure: The Importance of Data Encryption
In a world teeming with cyber threats, securing your data is not just an option—it's a necessity. By utilizing BitLocker for external drive encryption, you can safeguard your important files, ensuring privacy and security whether you're at home or on the go. Don’t leave your data unprotected; follow these steps to keep your information safe from prying eyes!






 Brasil (PT)
 Canada (EN)
 Chile (ES)
 Česko (CS)
 대한민국 (KO)
 España (ES)
 France (FR)
 Hong Kong (EN)
 Italia (IT)
 日本 (JA)
 Magyarország (HU)
 Norge (NO)
 Polska (PL)
 Schweiz (DE)
 Singapore (EN)
 Sverige (SV)
 Suomi (FI)
 Türkiye (TR)
 الإمارات العربية المتحدة (AR)